
how did you use media technologies in the construction, research, planning and evaluation stages?
IN THE MAKING OF 'I HEAR YOU', TECHNOLOGY WAS PRESENT THROUGHOUT THE ENTIRE STAGES OF PLANNING, RESEARCH AND PRODUCTION. aS A GROUP WE HAVE AIMED TO USE ALL THE TECHNOLOGY AVAILABLE TO US FROM mAC COMPUTERS, VARIETY OF SOFTWARES, the internet, TO FILMING EQUIPMENT. aS EACH MEMBER OF THE SCRATCH STUDIOS CREW DID 'as MEDIA', we all had a bit of experiencing using the Macs, however in a2, we explored a lot more on the macs. majority of the softwares we used in a2 apart from photoshop was new to us all, so we learned as we as the project went on. Time consuming in a way but fun and interesting to see the outcomes of what we produced on the softwares after experiment on it.
mac computerOur mac computer 'leather FACE' (THE MAC COMPUTER SCRATCH STUDIOS WAS ASSIGNED TO FOR THE PROJECT) helped US THROUGH THE DEVELOPMENT, PER-PRODUCTION AND PRODUCTION STAGES. THE MAC CONTAINS THE FOLLOWING SOFTWARES; sound track pro, FINAL CUT PRO x, garageband, final cut pro, photoshop, Audition , After effect, imovie AND MUCH MORE. tHE LISTED SOFTWAREs WERE THE MAIN SOFTWARES USED. In 'aS media' WE ONLY USED THE MACS FOR PHOTOSHOP, apart from tony who owns a mac book, THE REST OF THE CREW DIDN'T KNOW MUCH ABOUT MACS. tONY helped the group to learn how to use the mac quicker and more efficiently as he taught us the short cuts on the macs and we eventually learned the basics.
|
OUR MAC COMPUTERS WAS THE BEST COMPUTER FOR THE WORK WE WERE GIVEN, AS IT HAS A LARGE AMOUNT OF STORAGE SO EVERY PIECE OF WORK WE DID TOWARDS OUR PROJECT Could BE SAVED IN ONE Folder, IT IS QUICK AND IT'S EASY TO SAVE IMAGES AND HAS A WIDE SCREEN, SO MULTIPLE PIECES OF WORK COULD BE DONE AT ONCE. THE KEYBOARD WAS LABELLED AND COLOURED, WHICH MADE THE EDITING AND PRODUCTION STAGES OF THE ANANMTIC,SOUND AND HORROR TRAILER EASIER TO WORK ON.
|
PLANNING AND RESEARCH

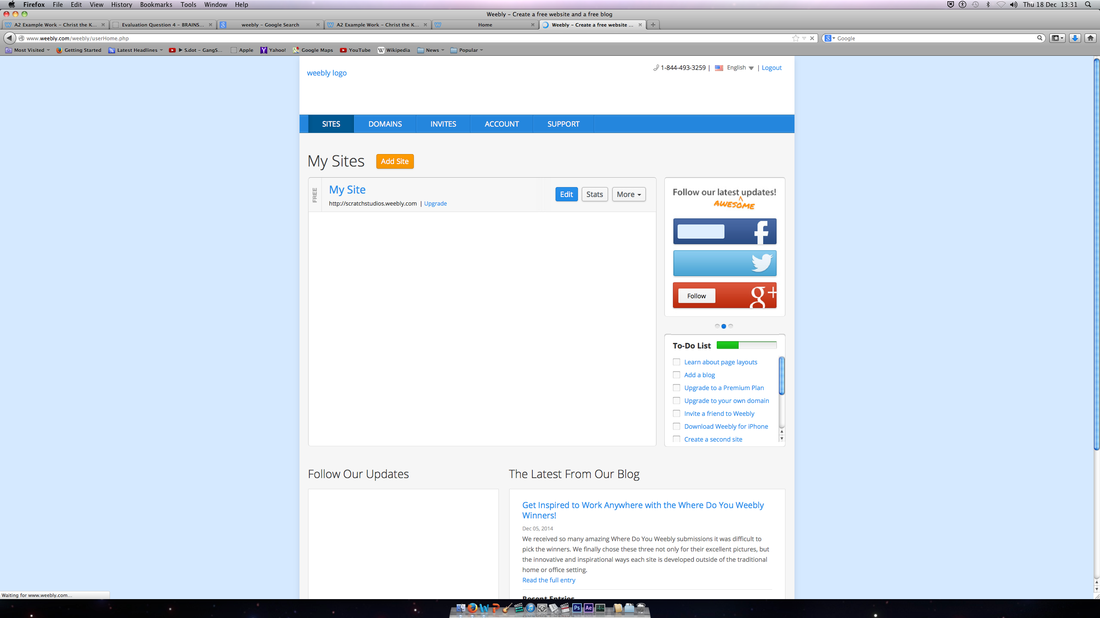
to start of our project, we had to set up and build a blog page called weebly. this blog page would contain our on going project from start to finish. we illustrated our weebly page to produce our group work interactively , engaging to viewers as well as presenting it professional and making it intriguing.
|
|
|
when we first set up our weebly account, it already had a default background and banner. to change it up and incorporate the horror theme, we decide to change all our banners to scary gifs from tumblr. Then to make our weebly website easy to view, we added drop down menus, allowing viewers to navigate the page with no difficulty, also making the weebly page clear, tidy, structured and professional. we then added our designed and created logo onto our weebly and made sure on our home page, there was a group image to introduce the scratch studios crew to the viewers.
|

in building our weebly page we used elements from a tab on the side of the page which allowed us to upload titles, text, images, slideshows, buttons, dividers, youtube videos and files to upload sound. Without these elements we wouldn't have been able to create an engaging and creative weebly website page. And the presentation of our work without them would have been dull and boring. the use of the multimedia elements gave our blog page life and excitement and for the scratch studio crew we found it fun playing with page, in contrast to the fact we were doing work. |
we found using the weebly engine easy to use as we used it in 'AS MEDIA', although we explored with it a lot more this year.

|
|
We used the search engine 'google' as a technology to help us with our summer work to obtain images and more knowledge on horror and it's different genres. in addition to that, it allowed us to obtain secondary research of existing media horror posters, magazines and film trailers for our planning stages. google is the main search engine we use as a source to visit different websites. |

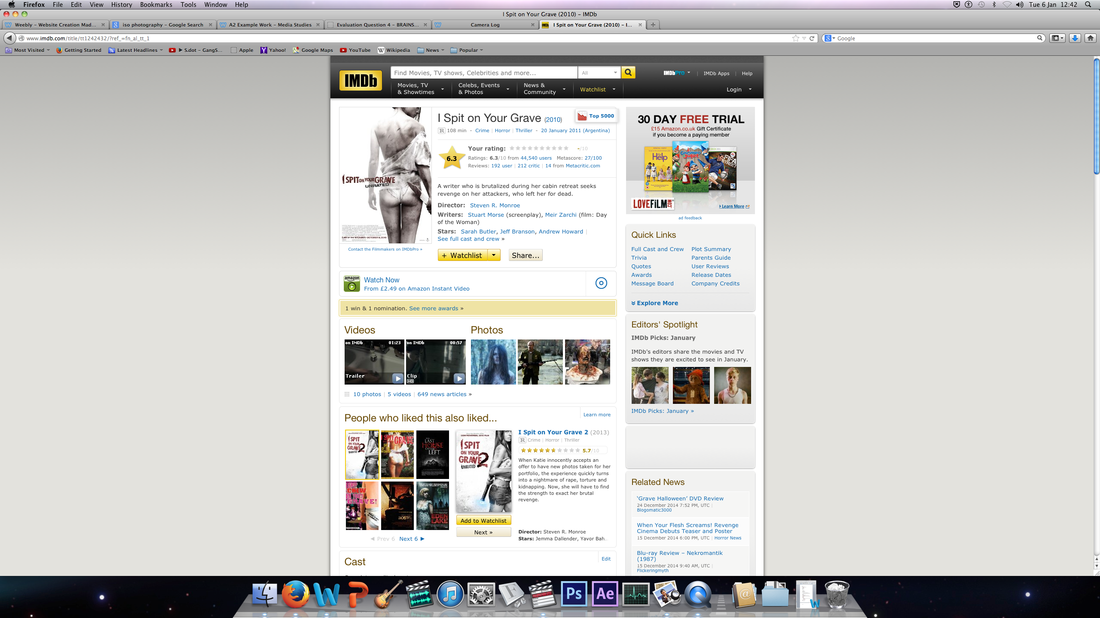
imdb (internet movie database) is an online database website that provides information related to films, including cast, production crew, fictional characters, biographies, plot summaries, trivia and reviews. We used it to research existing horror films for film inspiration and elements we could incorporate into our horror trailer.

|
Microsoft PowerPoint
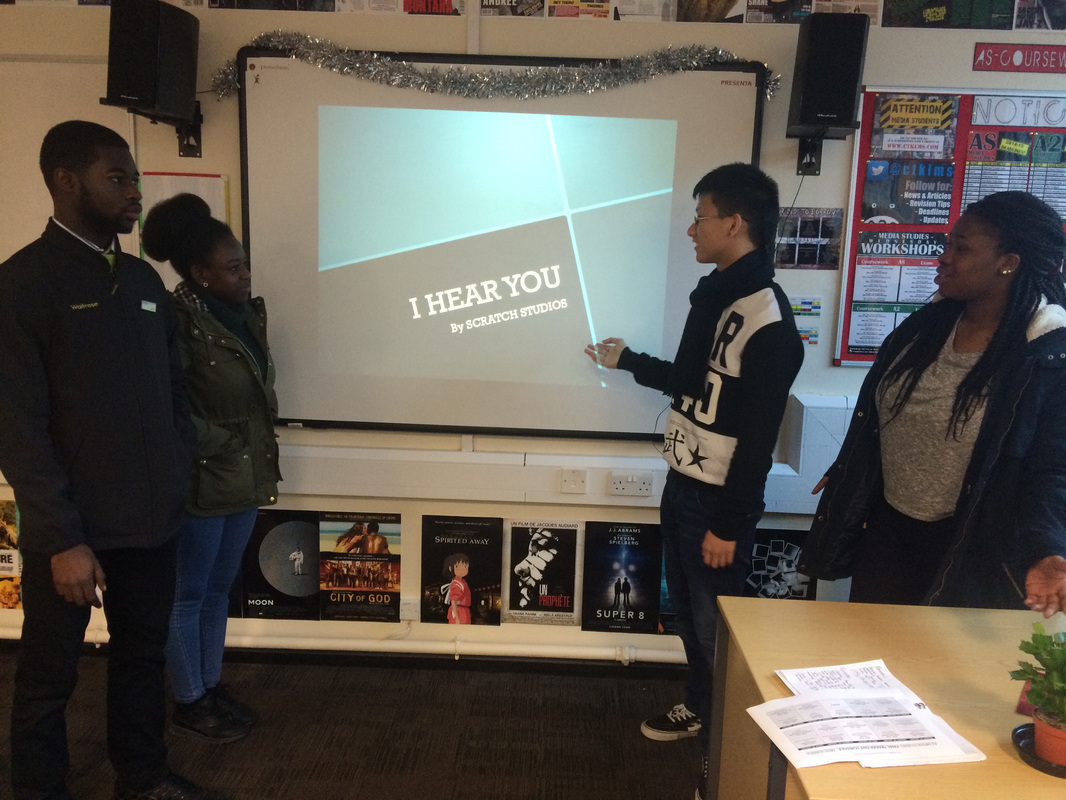
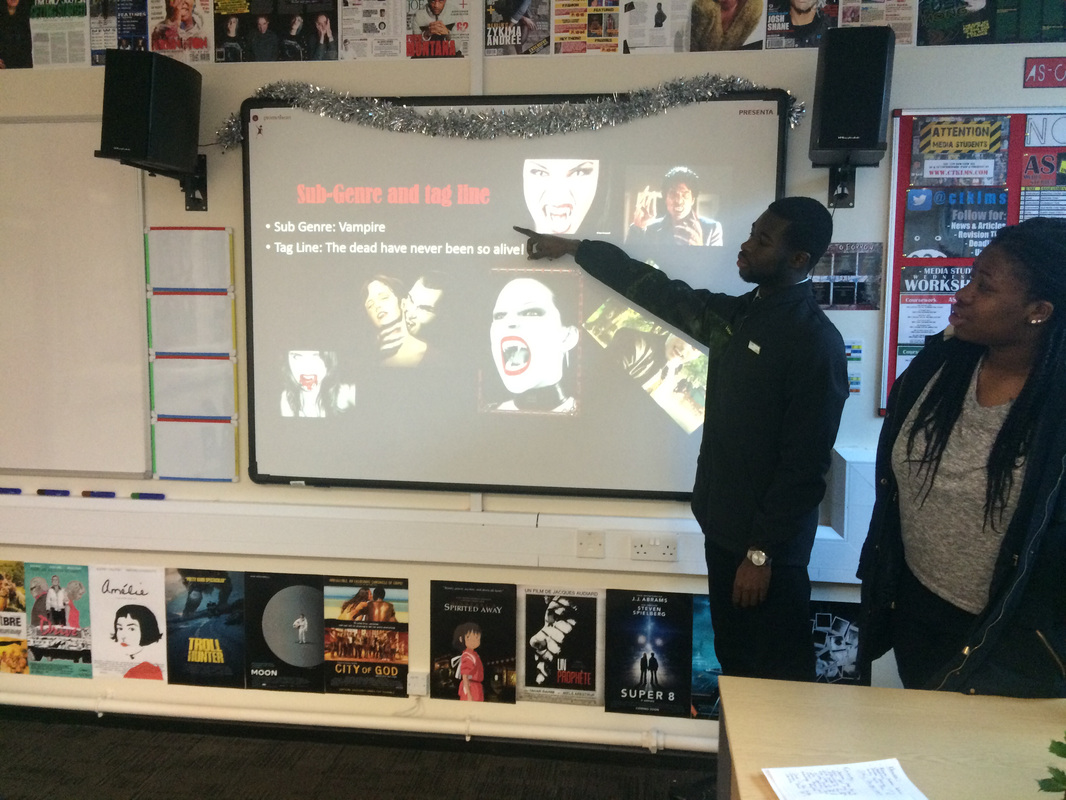
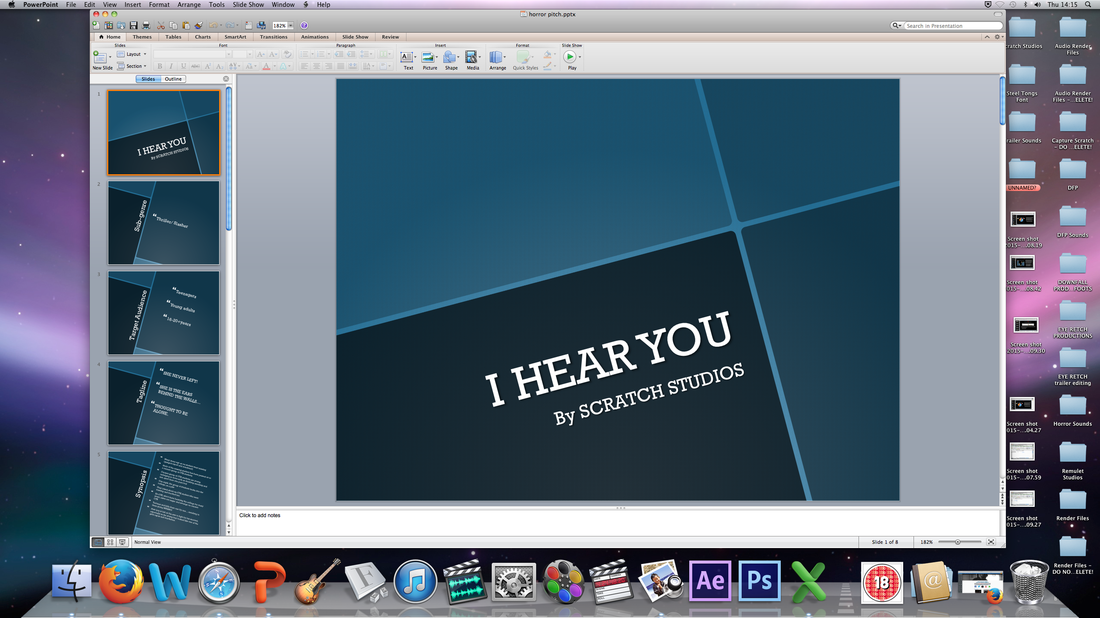
Before we came up with our final treatment to ' i hear you', we had to present our summer work concepts to the class, who elected one concept as the best concept to use for our project. the way we did this was by using the technology of A SOFTWARE CALLED microsoft powerpoint. to produce a powerpoint slideshow, which we used to present our concepts to the class. Microsoft powerpoint is a software we all knew really well, SO IT WAS EASY TO USE. THE SLIDESHOWS WAS CLEAR AND EASY TO FOLLOW, ESPECIALLY AS THE INFORMATION WAS SPREAD OUT EVENLY ACROSS SLIDES TO REDUCE CONFUSION. |
|
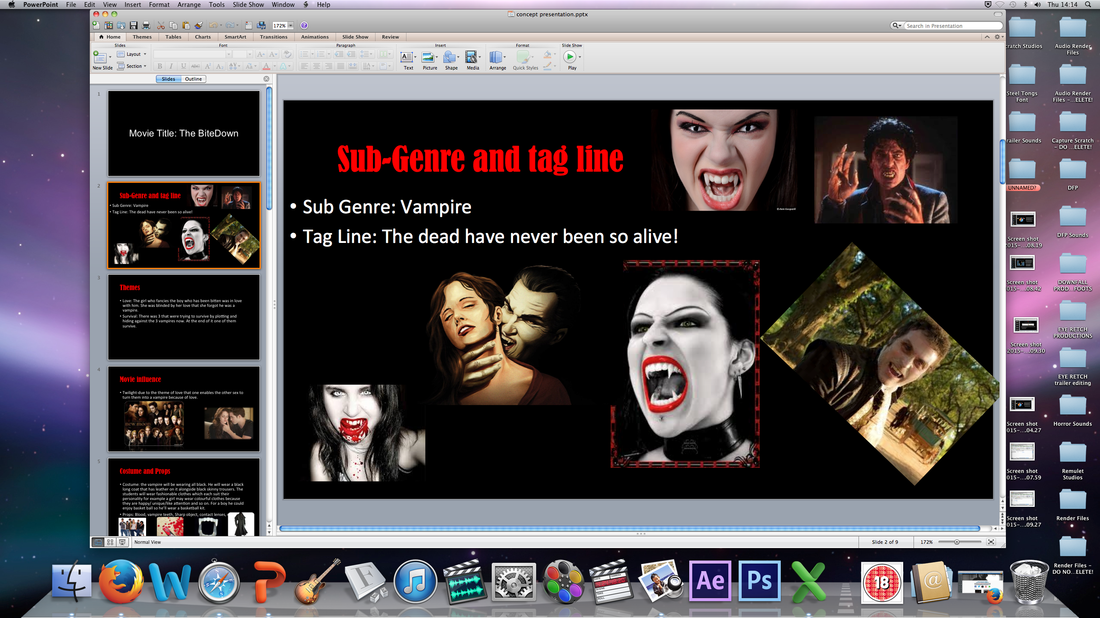
we also used Microsoft PowerPoint to create slideshows to evaluate each of the 10 questions for our poster, magazine and trailer. in addition to that we added a form of a diagram to present it visually.

|
Microsoft excel
WE USED MICROSOFT EXCEL TO TAKE OUR AUDIENCE RESEARCH FIGURES FOR EACH OF THE 10 QUESTIONS FOR THE POSTER, MAGAZINE AND TRAILER QUESTIONS TO CREATE DIFFERENT FORMS OF DIAGRAMS. WE DID THIS BY MANUAL IMPORTING THE FIGURES ONTO A TABLE WHICH WAS LINKED TO A DIAGRAM OF OUR CHOICE, WHICH FORMED THE RESULTS ONTO A DIAGRAM. we used pie charts as the diagram for the poster questions AND used bar charts for the magazine diagrams.THEN MANUAL WE CREATED A tally chart table to present the trailer results.
|
|
PHOTOSHOP
|

|
Youtube |
|
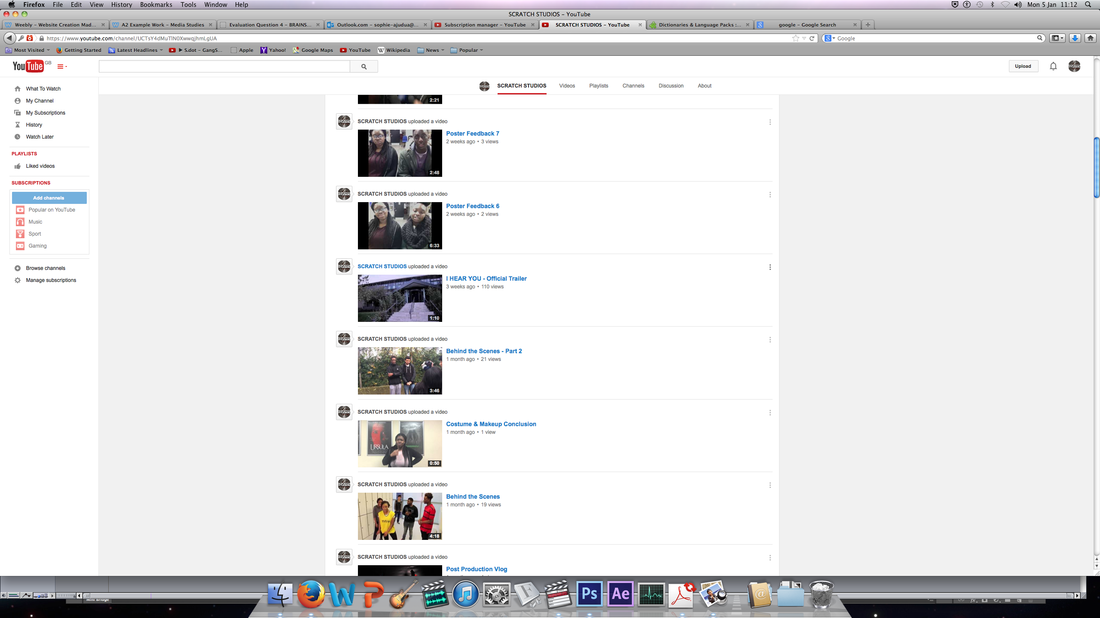
youtube was very useful as in order to upload videos to our weebly website, we had to first upload the video to a youtube account. so we created a group youtube page called scratch studios . we all used the youtube account page to upload every video we posted onto our weebly website. as millions of people worldwide browse videos on youtube, it is one of the best ways to share and promote your videos. Youtube allowed us to share our videos with other viewers, media students and teachers who viewed our weebly website. it was easy to use youtube in terms of uploading videos, captioning them, accessing the videos to post on to weebly and browsing on it. A key aspect about youtube is it gives us statistics on the number of views each of our videos receive and whether people like or dislike the contents of the video.
for our planning and research we used youtube to watch existing horror trailers for inspiration and to learn the conventions...... YouTube was also very handy as it allowed us to watch tutorials of how to use the SOFTWARES we had no experience on, which within two to three sessions on it we learnt the basics ESPECIALLY AS it was easy to search on. |
|


|
NETFLIXFOR HORROR INSPIRATION WE WATCH SOME EXISTING HORROR FILMS ON A WEBSITE CALLED NETFLIX. THIS WEBSITE ALLOWS YOU TO WATCH FILMS FOR FREE FOR ONE MONTH AFTER JOINING AS A MEMBER.
WATCHING A VARIETY OF HORROR FILMS HELPED US TO ANALYSE MEDIA CONVENTIONS THAT MADE UP A HORROR FILM FROM THEME, CHARACTERS, SITUATIONS TO CAMERA MOVEMENT, ANGLES AND FRAMES . AS WELL AS GIVEN US A SENSE OF IDEAS TO CREATE OUR HORROR CONCEPT. |
|
MOBILE PHONES/ SOCIAL MEDIA
WE USED AN IPHONE , WHICH IS A HIGH TECH SMARTPHONE AS SOCIAL MEDIA TO COLLECT OUR AUDIENCE RESEARCH. MOBILE PHONES ARE A DEVICE WE KNOW MANY OF OUR TARGET OWN AND USE TODAY FREQUENTLY AND IT'S THE BEST WAY TO GET HOLD OF THEM. WE WERE ABLE TO USE AN IPHONE, AS IT CONTAINS APPS SUCH AS WHATSAPP, IMESSAGE, AND TWITTER ETC. THESE WERE THE APPS WE USED TO COMMUNICATE TO OUR TARGET AUDIENCE ASKING THEM QUESTIONS TO RETRIEVE A RESPONSE.

Whatsapp
|
iMessage
|

Twitter
|
WE USED WHATSAPP TO collect audience research on the horror magazine, trying to find out what they would want to see on it. IMESSAGE WAS USED TO OBTAIN the kind of poster they preferred, whilst we used TWITTER'S DM (DIRECT MESSAGE) TO find out what they would want to see in the trailer. MOBILE PHONES ALSO ALLOWED US TO TAKE SCREENSHOTS OF OUR MESSAGES TO USE AS EVIDENCE FOR OUR WEEBLY WEBSITE.
|
|
|
|
tutorialsFOR COSTUME AND MAKE UP BRANDI USED HER NIKON CAMERA AS WELL AS HER LAPTOP WEBCAM TO FILM TUTORIALS OF HERSELF EXPERIMENTING THE MAKE UP SHE HAD TO PRESENT ON THE DAY OF SHOOTING. THIS WAS DONE FOR HER TO HAVE A LOT OF PRACTICE, SO ON THE DAY COSTUME AND MAKE UP WOULDN'T BE TIME CONSUMING. WE USED YOUTUBE TO UPLOAD THE VIDEOS TO ACCESS THEM ON OUR weebly PAGE.
|
|
PRODUCTION
THE PRODUCTION STAGE INVOLVED CREATING THE FINAL PRODUCTS FROM THE HORROR POSTER AND MAGAZINE TO THE HORROR FILM TRAILER. IT WAS THE MOST NERVE RACKING AND INTENSE STAGE OF OUR ENTIRE PROJECT, AS WE HAD DEADLINES TO MEET AND OUR PROJECT WAS QUICKLY COMING TO AN END. THERE WERE SOME PARTS WE ENJOYED AND OTHERS WE DID NOT BUT WE GOT THROUGH IT IN THE END. THIS WAS THE STAGE WERE WE USED FILMING EQUIPMENT AND PROGRAMES SUCH AS FINAL CUT PRO, FINAL CUT PRO X, SOUNDTRACK PRO, PHOTOSHOP AND MORE, WHICH WE EXPERIMENTED A BIT ON DURING OUR PLANNING AND RESEARCH STAGE.
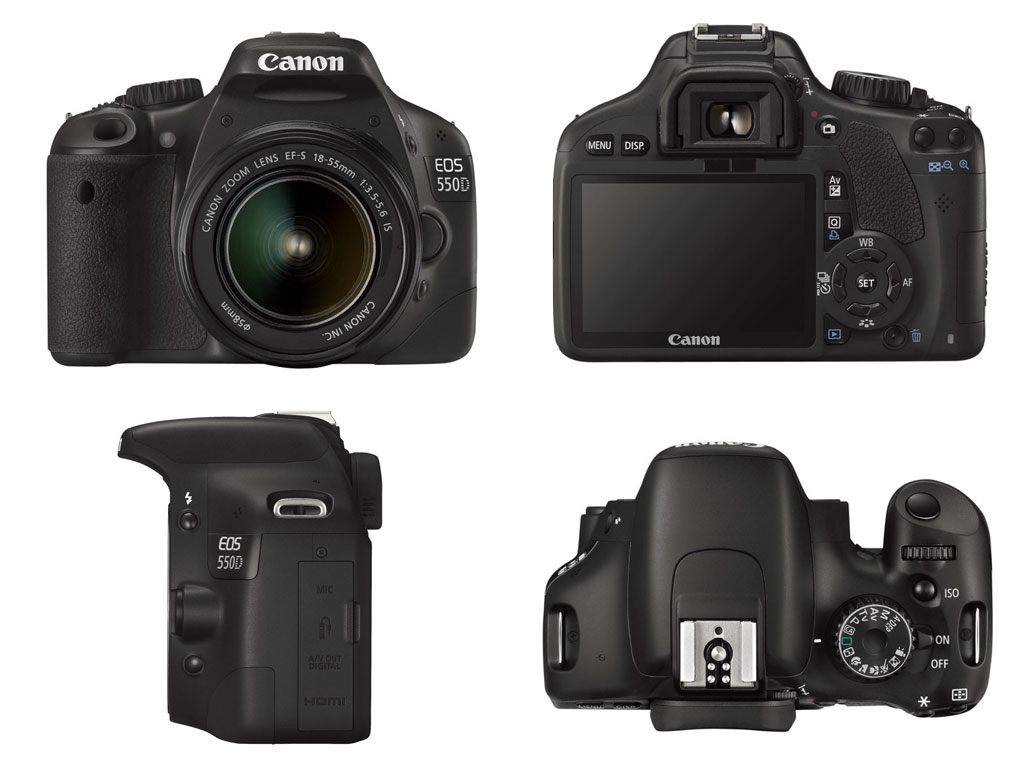
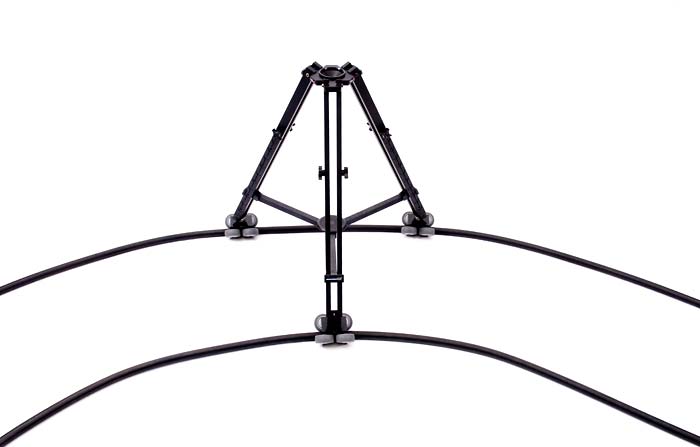
BEFORE OUR SHOOTING DAY, WE HAD CAMERA FILMING SESSIONS FOR A WEEK ON HOW TO USE THE CANON 550D. LEARNING ITS BASICS. FOR EXAMPLE, FOCUSING THE LENS OF THE CAMERA. WE ALSO Practiced USING DIFFERENT FILMING EQUIPMENTS SUCH AS TRACKING, A TRIPOD, STEADICAM AND A HAND HELD RIG TO SHOT IN DIFFERENT ANGLES AND SHOT FRAMES. THIS HELPED US, AS PRACTICING TO USE THESE EQUIPMENTS WOULD ALLOW US TO USE OUR TIME MORE EFFICIENTLY ON THE DAY OF SHOOTING. WE ALSO TOOK SOME TEST SHOTS IN OUR OWN TIME AND WHEN WE DID THE LOCATION RECCE, PREPARING US FOR WHAT TO EXPECT. our PLANNING AND RESEARCH PREPARED US A LOT FOR PRODUCTION.
FILMING AND SHOOTING PROCESS
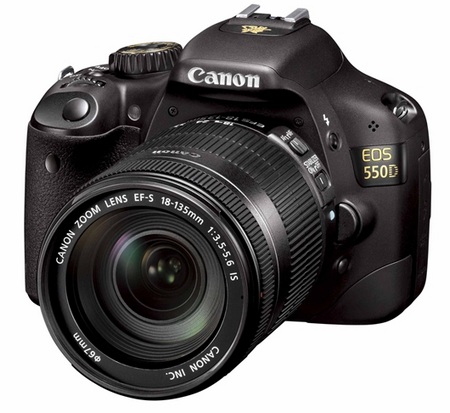
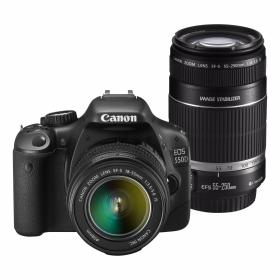
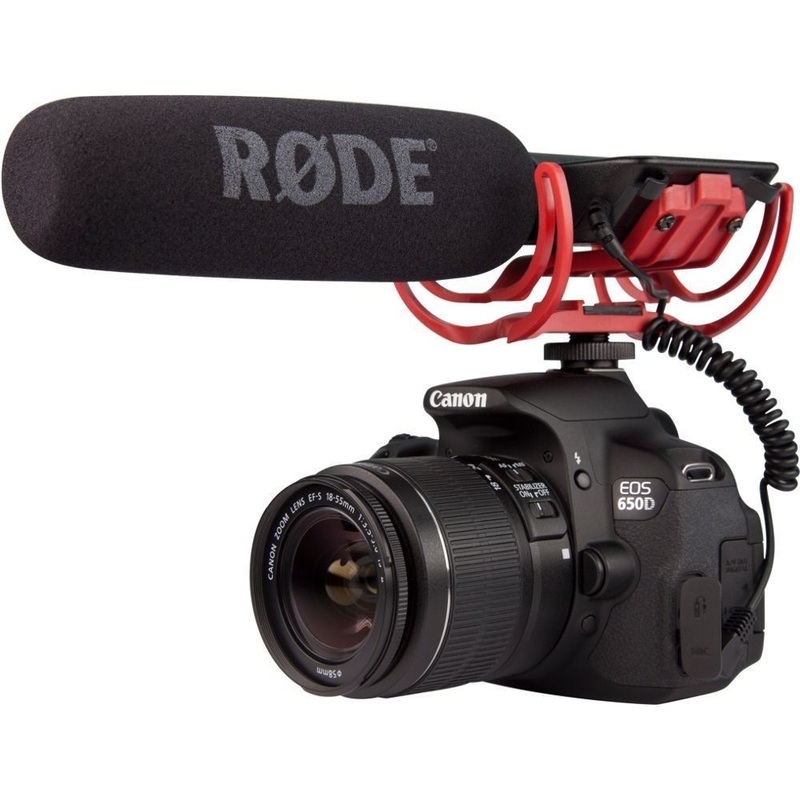
CANON 550D the camera we used to shoot our trailer was the canon 550D. the only experience we had with the canon was in taking pictures and adjusting the lens and had no filming experience. so we had a weeks tutorial on how to use it efficiently. the camera was easy to carry around and once we had the training it was easy for us to obtain high quality shots. 
stm lens canon 18mm-135mm
in addition to using the canon 550d, we attached a 18mm-135mm lens to it, this allowed us to shot from a far distance and still get good shots, as we were able to adjust the addition lens to zoom in and out to collect our footage. THE TIP OF THE LENS HAD TO BE ADJUSTED FREQUENTLY AS WE NEED ALL OUR SHOTS TO BE FOCUSED.
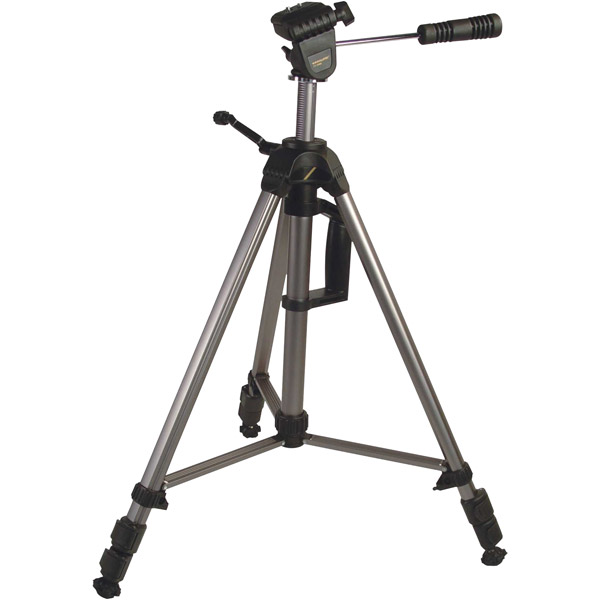
tripod
we used a tripod to help stabilize the camera, which ensured that our shots were steady, making them look professional and not wobbly/shaky. in using the tripod, the controller had to move at the same paste from start to finish and have a steady hand. it was easy to travel and set up with the tripod, but to get a stabilized centred frame, we had to make sure a little ball hit the centre target on the tripod, which sometimes was difficult. 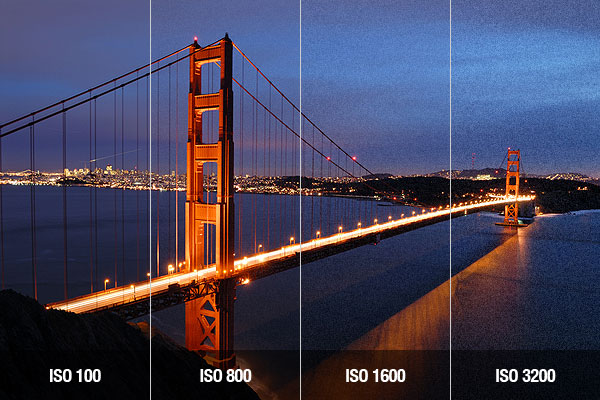
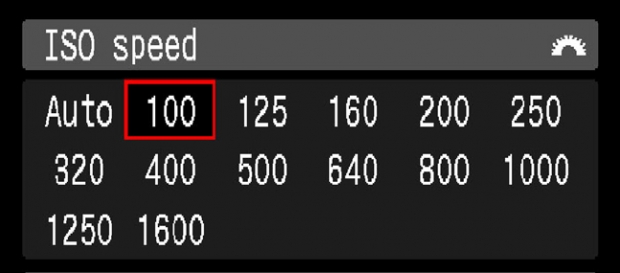
iso lighting
Iso (International Standards Organization) is how sensitive to lights the camera is . when filming we adjusted the iso on the canon 530d depending on the shot and lighting. if the shot was too dark we changed the iso up to a maximum of 300, and if it was to bright we would change it to 100 TO FILM LOW KEY FOOTAGE.
|
|
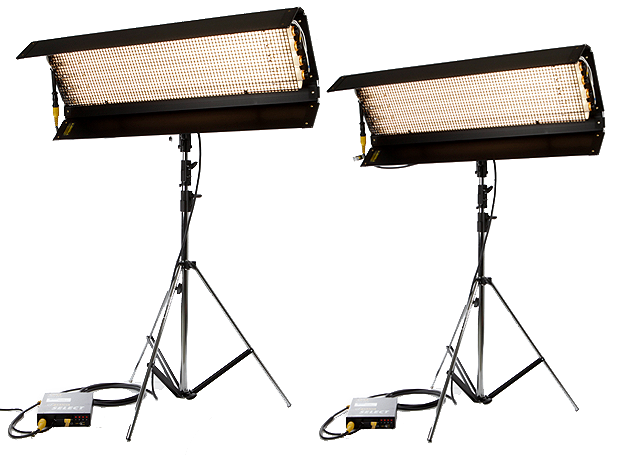

over all we found assembling some parts of the filming EQUIPMENT easy to do, although there were some parts we found difficult without the help of our teachers for example, raising the Kino flo stand.
footages from our trailer
below are four footages from our horror trailer with a short description of what is going on in the shot, the filming equipment we used to shoot them and how we were able to capture the shots.
|
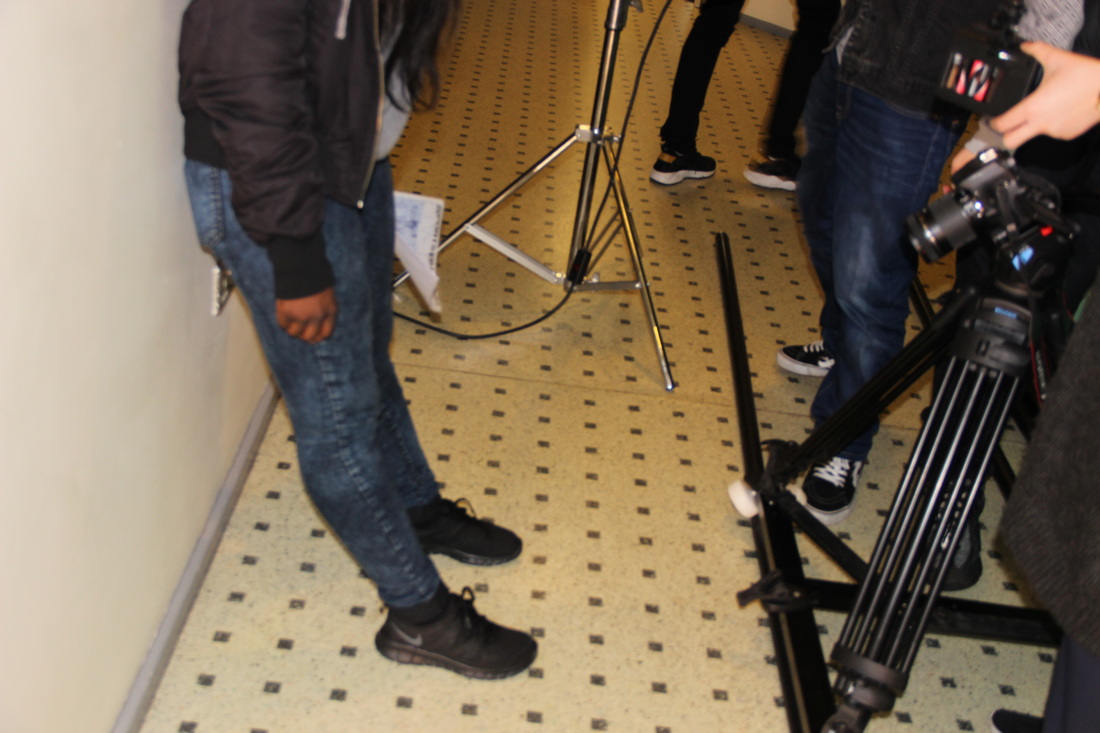
this shot is of 2 boys walking in a corridor. the filming equipment used was tracking, the canon 550d, tripod and a kino flo. we were able to capture this shot by the camera movement 'tracking'. the camera sat on a tripod, which sat on tracking poles was dragged along used to follow 2 boys walking in the corridor.
|
in this shot the delinquents are looking at their victim, horrified to see the outcome of their attack on her. the filming equipment used was a tripod, a canon 550d and a kino flo. we were able to capture a worms eye view by lowering the stand of the tripod and the cast looked down towards the camera.
|
|
this shot illustrates the protagonist's torture weapons spread out on a table. the filming equipment used for this shot is the canon 550d and the hand held rig. we were able to capture this shot as the hand held rig sat on the camera person's shoulder which allowed us to shot the footage.
|
this shot presents the delinquents kicking their victim on the floor. the filming equipment we used was the canon 55od and a kino flo. we were able to capture this shot by simply placing the camera on the floor which was a flat surface. this position allow us to capture some of the floor as well as the victim being kicked but from a distance afar.
|
behind the scene of filming
below are some behind the scene footages we put together into 2 separate videos, as our filming did not all occur on the actual day of filming. We used a separate Canon 55od to film ourselves filming our trailer footages as well as filming on our iPhone. the reason we did this was to show proof that we originally filmed our trailer shots by ourselves and to show us using the filming equipments.
|
|
|
photoshoot

canon 550d for the photoshoot images we took for the final poster and magazine, we used the canon 550d, which is the same camera we used to shot our trailer footages. we found it easy to obtain good quality images as we already knew how to use the camera to capture images from the past and the basics we need to do was to adjust the camera lens , and rotate it to the frame shot we wanted. |
|
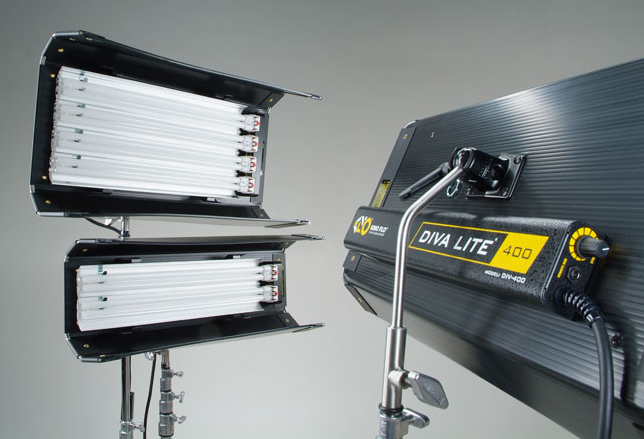
kino flo As we needed rich and sharp quality images we used a kino flo, as additional lighting to softly brighten up our shots. and as we had practice from using it for filming, it was easy to set up. |
|
|
SOME GOOD PHOTOS TAKEN
Above are some photos we took from our photoshoot, which came out quite well. we took a variety of shot frames from extreme close up to close ups to mid-shots. the lighting wasn't too bright and wasn't to dark which allowed us to edit the photos on photoshop.
|
SOME BAD PHOTOS TAKEN
Above are some of the photos we took that came out bad, that we couldn't use, either due to it being out of focus, not centred, too dark, too bright or the shot just wasn't taken properly. this all made the photos look un-professional and unacceptable to use.
|
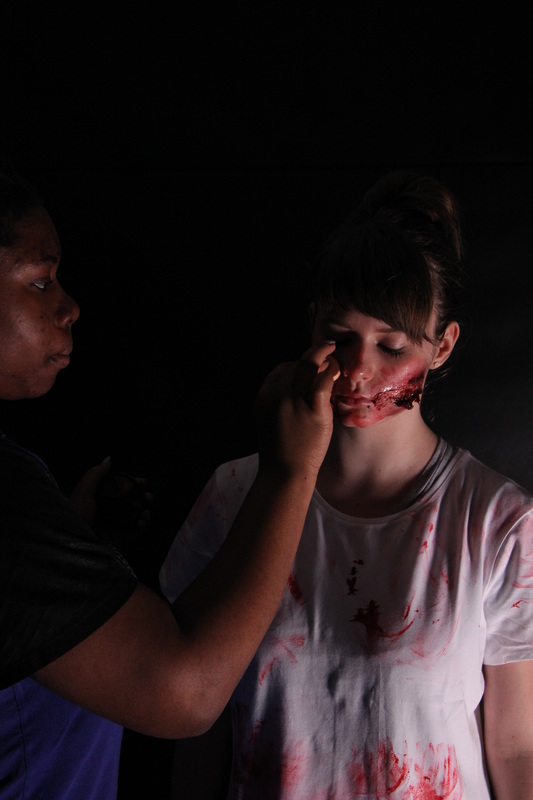
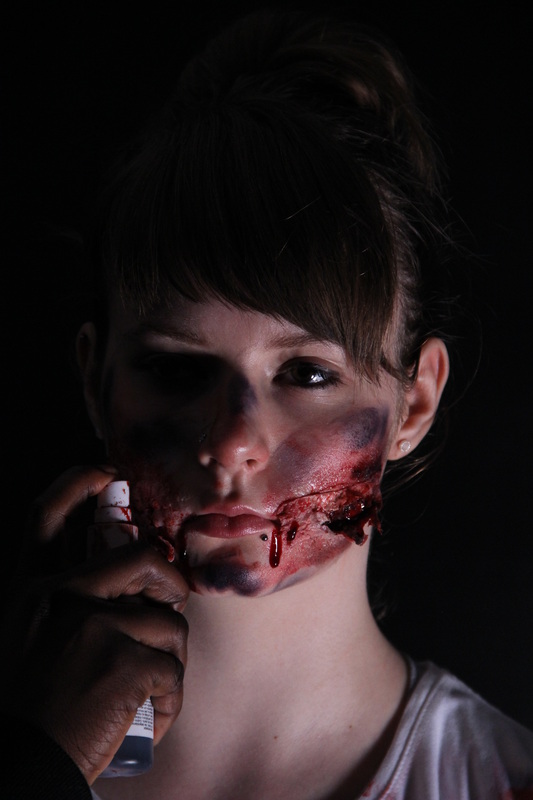
ON THE DAY OF SHOOTING WE HAD TO MAKE SURE WE FOLLOWED THE HEALTH AND SAFETY RULES, SO THERE WOULD BE NO ACCIDENTS. E.G. MINDING WHERE WE PLACE THE WIRES TO THE FILMING EQUIPMENTS, NO RUNNING AROUND NEAR THE EQUIPMENTS, BE CARE OF DROPPING A HEAVY EQUIPMENT ON OURSELVES AND KEEPING AN EYE OF SHARP OBJECTS . AS OUR HORROR GENRE IS A SPLATTER, WE WANTED TO INCORPORATE A LOT OF TORTURE SHOTS SO WE COULD INCORPORATE THE GORGE BLOODY SCENES, SO WE HAD TO BE CAREFUL NOT TO HARM OUR CASTS WHEN TRYING TO MAKING A SHOT LOOK REALISTIC.
trailer editing
|
|
final cut pro/final cut pro x
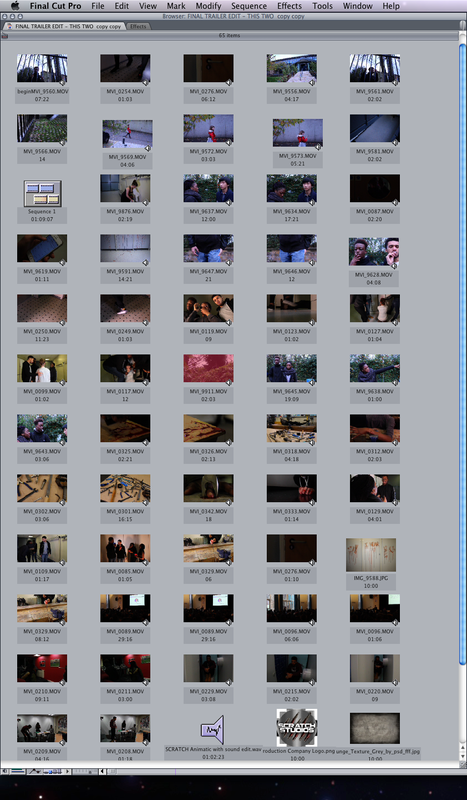
final cut pro is the software we used to create our animatic which lead us to producing our final horror trailer. as it was our first time using the software we learnt how to use it, along the way. the way it works is any piece of footage, image or sound we wanted to use, had to be imported onto the programme's library, where we then arranged where we wanted them to go, on a sequence timeline. WHEN PRODUCING OUR ANIMATIC WE USED DRAGGED THE SCANNED STORYBOARD IMAGES FROM THE LIBRARY TO THE SEQUENCE. THEN WE USED THE BLADE TO CUT DOWN THE LENGTH OF THE SHOT TO THE ACCORDING LENGTH WE WANTED EACH SHOT TO BE. tHEN IF NEEDED WE WOULD USE THE PEN TOOL TO MARK TO POINT AND DRAG A FADE IN AND FADE OUT WHEN NEED. as we used final cut pro to turn our storyboard to an animatic, we then replaced the animatic with our filmed footage to create our horror trailer. later we adjusted the lengths of the shots, added captions with a background and our created sound to the sequence, as well as adding some filter effects to construct the final trailer. the coloured and labelled keyboard became useful as they were short cuts to using the tools on the final cut pro software. final cut pro x is exactly the same as final cut pro but a bit more advanced. |
|
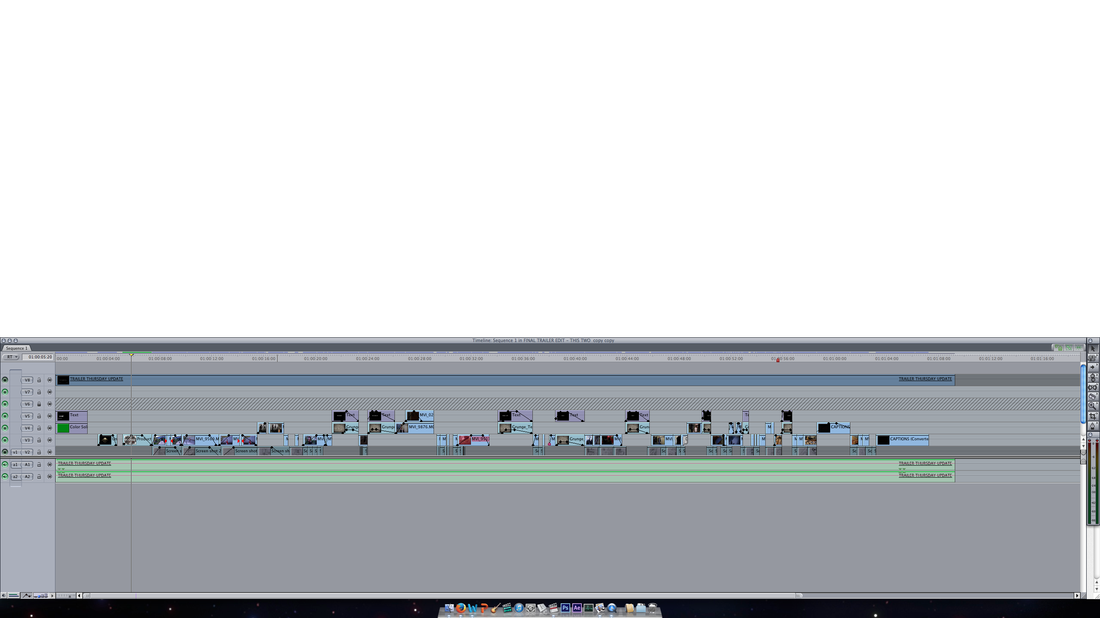
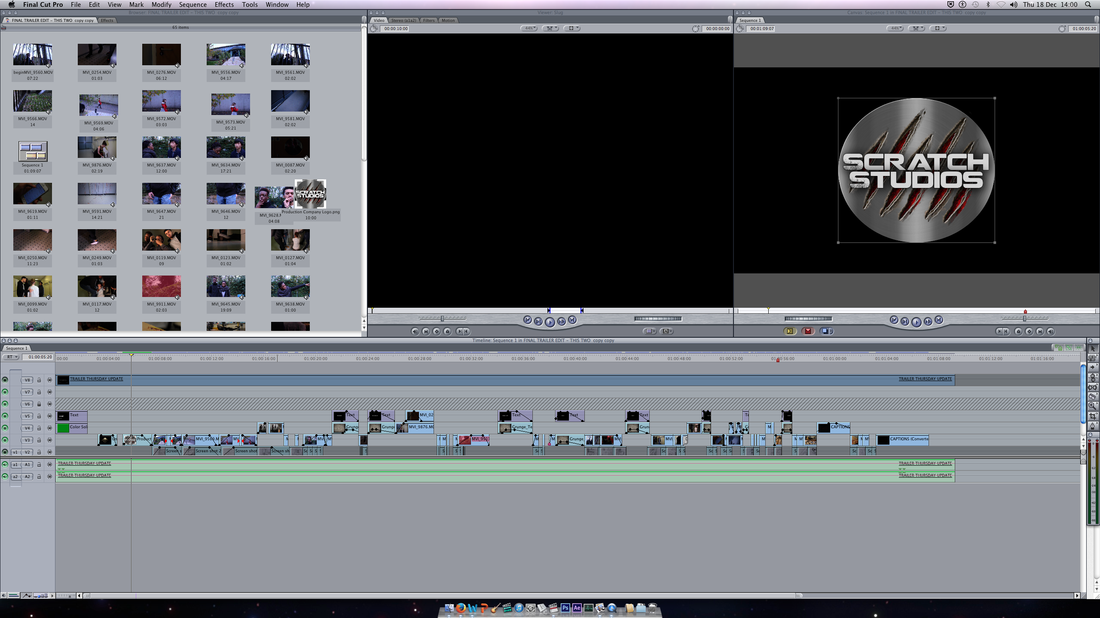
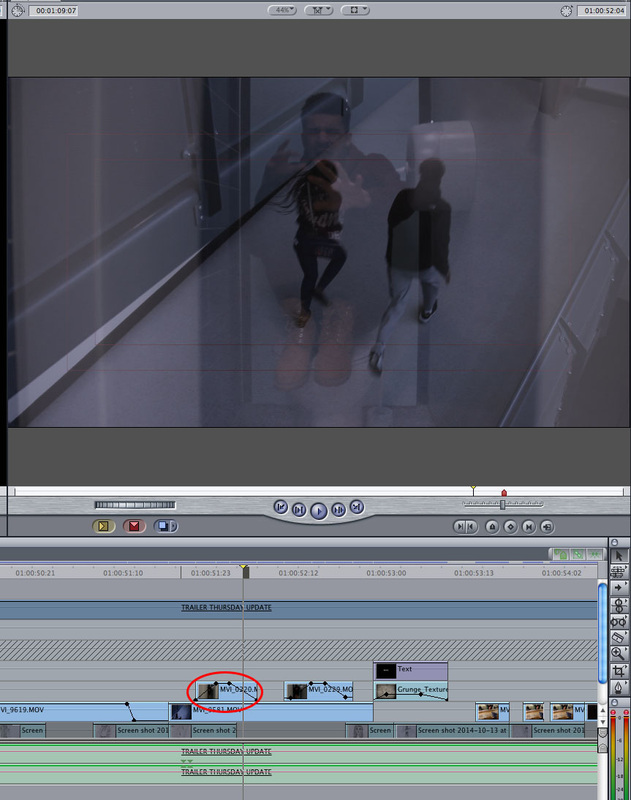
sequence timeline
the image on the left represents our sequence timeline, where you can see our footage and sound joint together. the footages were placed over the animatic, which is not present in the image, as this sequence image represents our final editing stage of our trailer, so we removed the animatic to focus on what we had. the sequence should be a replica of our animatic, however once we put in our footage we made adjustments to what we think looked and fitted well. so eventually our final trailer sequence had a few changes compared to its animatic.
the image on the left represents our sequence timeline, where you can see our footage and sound joint together. the footages were placed over the animatic, which is not present in the image, as this sequence image represents our final editing stage of our trailer, so we removed the animatic to focus on what we had. the sequence should be a replica of our animatic, however once we put in our footage we made adjustments to what we think looked and fitted well. so eventually our final trailer sequence had a few changes compared to its animatic.
|
Before we mentioned that as we were new to final cut pro, tHis is where YouTube came in handy as we were able to watch some tutorials on how to use the software effectively. below is one of the tutorial we watch, which helped us to use final cut pro. |
|
|
FADE IN AND FADE OUT
the image on the right shows you how we created and fade in and a fade out shot. using the pen tool on final cut pro we pin pointed 2 points. one point was place on the point to start fading in or fading out and the other was pointed in the corner diagonally across it. this allowed us to drag down the shade of the footage creating a fade. using fades was essential to our horror trailer as it allowed the shots to flow perfectly and connotes to time passing along. and as we had a lot of shots for our trailer we needed to use fade frequently to not cause confusing to our audience. |
|
below you will come across videos of how we tried to effectively use final cut pro in our horror trailer, using different effects, filters and shot frame (cross dissolve) with one example from our horror trailer.
|
BAD TV EFFECT
the bad tv effect was used on the establishing shot of where the horror film is indicated to take place. the effect allowed us to create a sense of unbalance in the beginning of the trailer, connoting to problems later on.
VIEW FINDER
we used the view finder to add an effect on our high angle shot of individuals running, in a corridor. this effect allowed us to capture the shot as if it was being recorded as a cctv footage, which was the shot we were going for. although I think we could've made it better if we spent a bit more time on it by making the view finder lines thicker and bolder and adding a filter similar to the bad tv effect but lighter to make it more of a realistic piece of footage.
|
CROSS DISSOLVE
the cross dissolve effect was used to show two events happening at the same time, this was useful and effective to our trailer as it was different to the rest of our footage. the idea is of this effect is to make the audience feel more intrigued, wanting to know what happens next.
3 WAY COLOR CORRECTION
as we shot our film footage in different locations, we obtained footages with different lighting, and to keep the horror trailer consistent and to look more realistic and filmed in a day, we used the 3 way color correction. this effect allowed us to make our blacks and white look more of a solid colour and we saturated all our footage to look the same. the saturation connoted to more of a horrific theme and we made our montage colouring more dark and of a tinted blue.
|
|
After effectWE USED AFTER EFFECTS TO CREATE OUR TITLE, CAPTIONS AND CREDITS FOR OUR HORROR TRAILER. As we wanted to keep our typography constant we used the same fonts we used on our poster and magazine for our captions. Then we looked for a background on the internet and dragged it behind the text and used the pen tool to bring down the shade of the selected background, which made it darker. After we used transitions to bring the captions in , from different ways and played with the background increasing and decreasing the edges, to make the whole page move at the same time, to make it more effective.
|

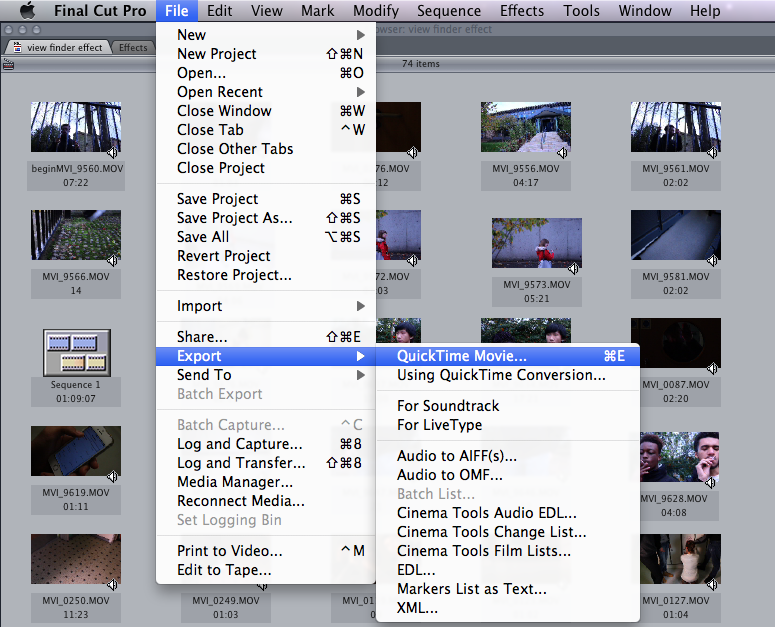
QuickTime in order to export our competed horror trailer we had to use QuickTime, which compressed our sequenced trailer into a HD video clip. THIS ALLOWED US TO UPLOAD A HIGH QUALITY VIDEO ONTO YOUTUBE, ALLOWING US TO ACCESS IT ONTO OUR WEEBLY PAGE. |
|
POSTER AND MAGAZINE

|
DAFONT.COM
IN CREATING OUR FINAL PRODUCTS PARTICULARLY THE HORROR POSTER AND MAGAZINE WE USED THE WEBSITE DATFONT.COM TO DOWNLOAD OUR FONTS. THE WEBSITE PROVIDED US WITH A HUGE VARIETY OF FONTS AND WAS EASY TO USE AS EACH FONT TYPOGRAPHY WAS CATEGORIZED. AFTER SCHEMING AND SCANNER THROUGH DIFFERENT FRONTS WE SETTLE DOWN TO USING 28 days later, SF Movie Poster, Fireye GF 9, Venus Rising and Steel Tongs fonts. THE FONTS WE CHOSE WERE FROM THE FANCY AND BASIC CATEGORIES AND IT WAS VERY EASY AND QUICK TO DOWNLOAD ONTO LEATHER FACE ( OUR MAC COMPUTER) WHICH WAS GOOD AS IT WAS TIME EFFICIENT. ALLOWING US TO MOVE ON WITH OUR PROJECT SWIFTLY. THE FONTS WE CHOSE WERE USED THROUGHOUT OUR THREE FINAL PRODUCTS TO SHOW CONSTANCY/SYNERGY. |
|

|
PHOTOSHOP
WE USED PHOTOSHOP TO CREATE OUR FINAL HORROR POSTER AND MAGAZINE. PHOTOSHOP ALLOWED US TO TURN OUR DRAWN DRAFTS TO A DIGITAL DRAFT WHICH WE USED AS A TEMPLATE TO PRODUCE THESE PRODUCTS, SHOWING AN ONGOING DEVELOPMENT FROM START TO FINISH. AS WE HAVE BEEN USING PHOTOSHOP SINCE 'AS MEDIA' WE MORE OR LESS HAD A LOT OF EXPERIENCE IN USING THE SOFTWARE. FOR EXAMPLE WE USED IT IN IMAGE MANIPULATION. OUR DRAFTING STAGES also ALLOWED US TO EXPLORE MORE, MAKING IT EASY TO USE PHOTOSHOP EFFICIENTLY. EXPERIMENTING WITH DIFFERENT TOOLS WHEN CREATING OTHER ASPECTS TO ADD TO OUR PROJECT E.G MOODBOARDS AND 'I HEAR YOU' FILM BANNERS GAVE US GOOD EXPERIENCE TO PRODUCE PROFESSIONAL PRODUCTS. |
|
trailer sound
|
|
free sound
FREE SOUND IS A WEBSITE THAT PROVIDES A WIDE RANGE OF SOUND COVERING A VARIETY OF SUBJECTS WHICH ALLOWED US TO DISCOVER SOME SOUND TO USE FOR OUR SOUNDTRACK. AS THE WEBSITE CATEGORIZED THERE SOUNDS WE OBTAIN SOME SOUND FROM THE WAR/WEAPON CATEGORY. 
|
|
example of some sounds we used in our horror trailer sound
|
|
|
| ||||||||
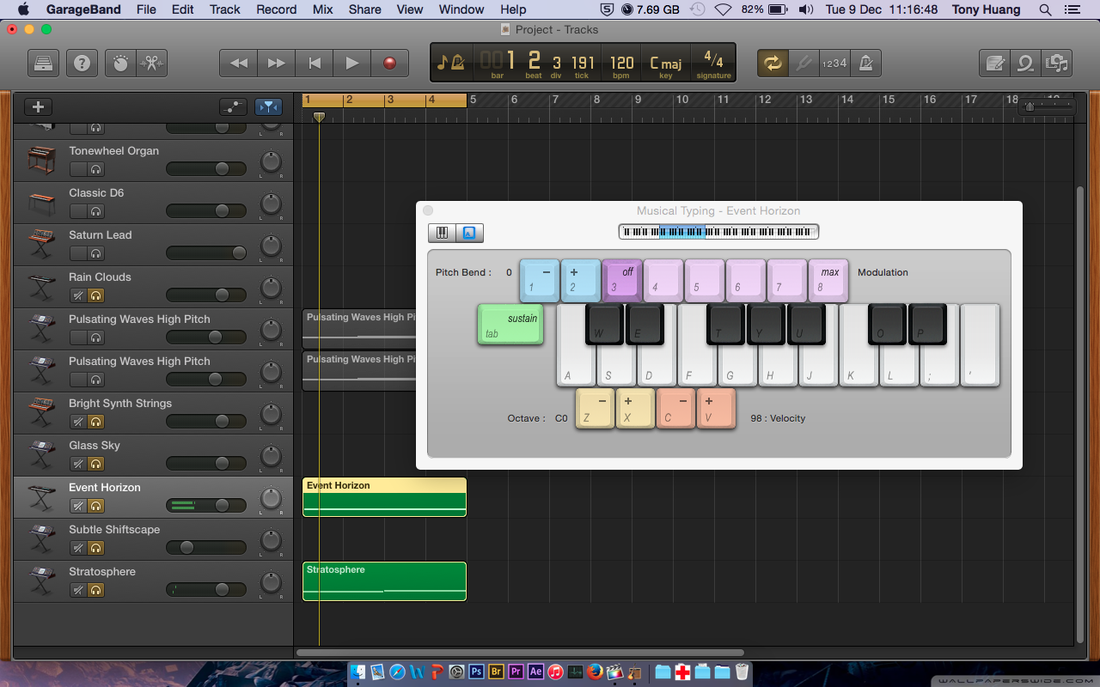
garage band
Garage Band is a sound synthesis software often used coherently with a Musical Instrument Digital Interface (MIDI). the software allowed us to compose a variety of sounds, from individual sounds to create an entire soundtrack. |
|
|
Sound Track Pro
we first imported THE sound OF OUR CHOICE THAT SUITED OUR ANIMATIC on to the software. THEN BY DRAGGING THE SOUND FROM THE LIBRARY TO THE ANIMATIC SEQUENCE WE PLACED THE SOUND ACCORDING TO THE PACE OF THE SHOT. FOR TWO DIFFERENT SOUNDS TO PLAY TOGETHER WE BUILT THEM ONTO OF EACH OTHER TO CREATE A SENSE OF TENSION, SUSPENSE AND POWER. AND WE USED FADES TO BLEND TWO SOUNDS TOGETHER SO IT WILL FLOW USING THE PEN TOOL. THE BLADE TOOL WOULD BE USED TO CUT UNNECESSARY PARTS OF A SCORE THAT WAS NOT NEEDED. this PROCESS WAS ONGOING AS WE ALWAYS MADE CHANGES TO THE FILM TRAILER, WHICH MEANT THE SOUND WE NEED TO BE ALTERED AS ACCORDING. |
|
|
semi-final sound --->
|
| ||

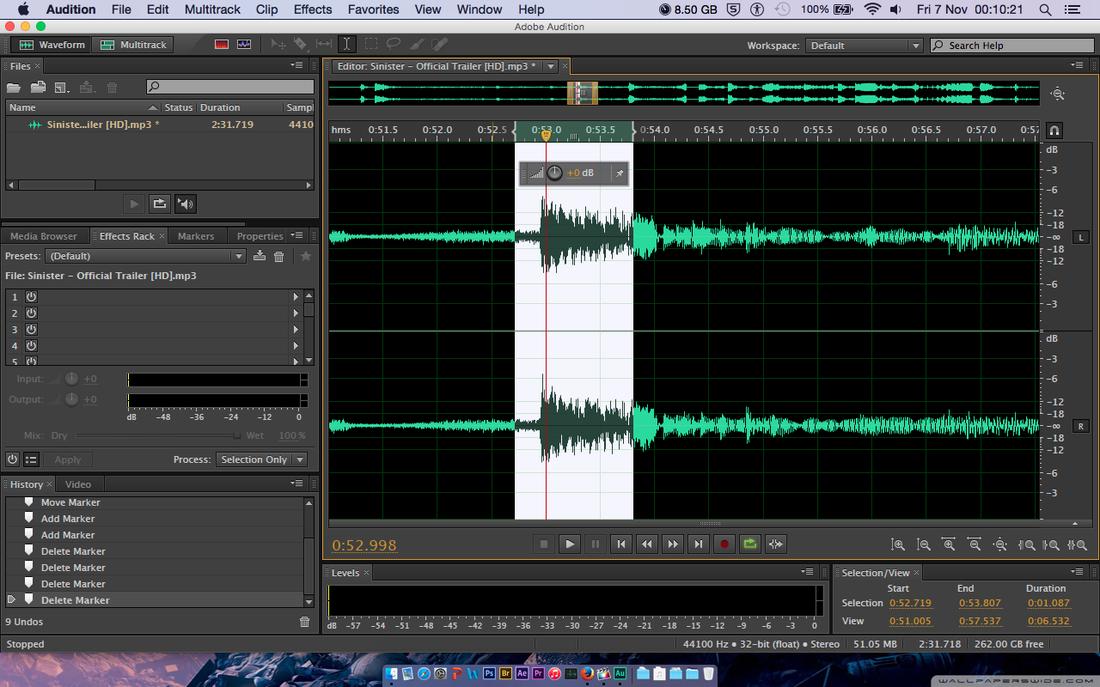
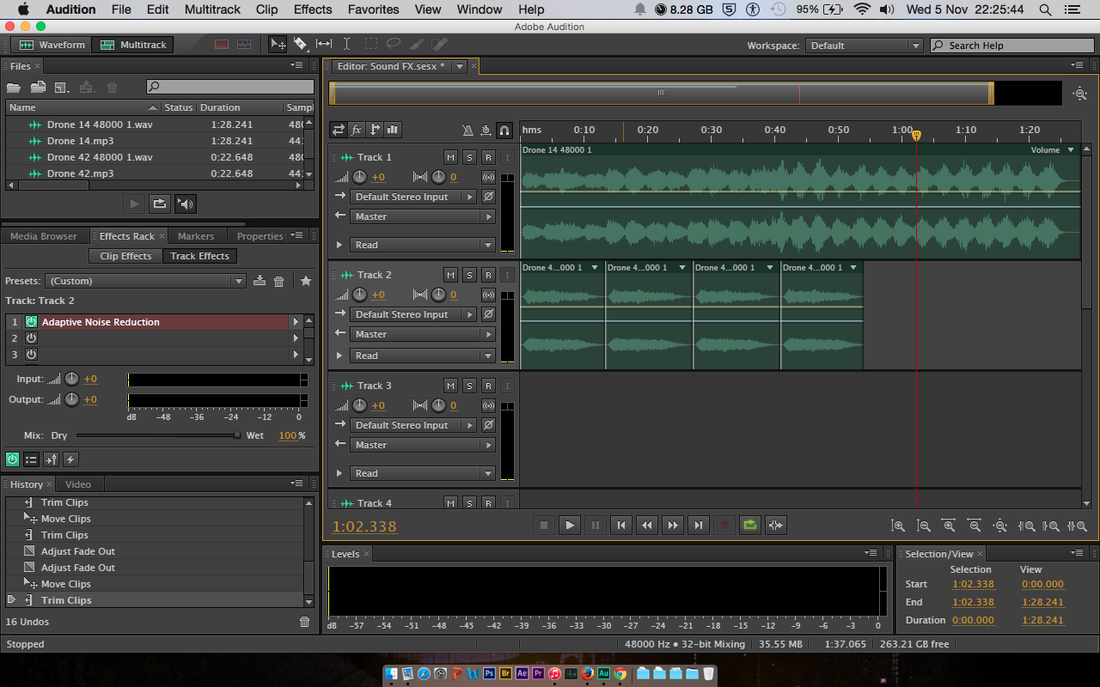
Adobe Audition CS6
we used adobe audition to convert, cut and compile sounds. as at certain points of creating our sound tony would take the produced trailer sequence home and edit the sound to any changes we made on his mac book using the updated version of final cut pro which is final cut pro x.
we used adobe audition to convert, cut and compile sounds. as at certain points of creating our sound tony would take the produced trailer sequence home and edit the sound to any changes we made on his mac book using the updated version of final cut pro which is final cut pro x.

CONCLUSION
To conclude, technology has played an enormous role in our horror project from the planning & research stages to the development and production of our final 3 products. we were fortunate to have access to all these types of technology which help us to CONSTRUCT high quality standard of work. we used the internet to share our work which allowed us to retrieve a lot of audience feedback, which we used. Leather face (our mac) was extremely useful as we used it to get majority of our resources and produce our products on it, especially the trailer. the canon 53od also played a large role to our project as it was the device we used to capture our images and trailer footages, which FORMED our products, without it there would be no final products. in addition to that final cut pro and photoshop were essential to the project as they are the two main softwares we used to edit,develop and produce our final products on. all the technologies we used worked WELL together to BRINGING about our final products AND BEING A LEARNING EXPERIENCE.

